
WiFi access point (hotspot)
Welcome to this guide to the WiFi access point. This feature turns your HAI-P200-4G controller into a WiFi hotspot: your phones, tablets and laptops connect to it directly, reach the controller’s interface, and can even use its 4G or Ethernet Internet connection. It is the ideal tool for working on an installation with no network, or for troubleshooting an isolated machine.
Prerequisites
Section titled “Prerequisites”- The HAI-P200-4G controller
- HAI-OS
- To share Internet: an Ethernet cable plugged in, or an active SIM card in the 4G modem
What is the access point for?
Section titled “What is the access point for?”Three main uses:
- Working on site with no network infrastructure. You arrive at a cabinet, connect to the controller’s WiFi with your tablet, and immediately reach the Data-Explorer, the alarms and the configuration — no cable, no switch, and no need to ask for access to the customer’s network.
- Giving Internet to an isolated device. The controller shares its 4G or Ethernet connection with the devices on its WiFi: handy for troubleshooting a laptop in a room with no network.
- Creating a closed local network. By choosing to share no connection at all, you get an isolated WiFi network where the controller hands out the IP addresses: useful for a test bench or a demonstration.
Important: Client or Hotspot, you have to choose
Section titled “Important: Client or Hotspot, you have to choose”The controller has only one WiFi radio. It can either connect to an existing network (Client mode) or broadcast its own network (Hotspot mode), but never both at once.
The switch is automatic in both directions: enabling the access point disconnects the WiFi client, and going back to Client mode stops the access point then tries to rejoin the previous network.
Creating your access point
Section titled “Creating your access point”Go to the Connection > WiFi menu, then move the selector at the top of the page from Client to Hotspot. The WiFi Access Point (Hotspot) card appears.
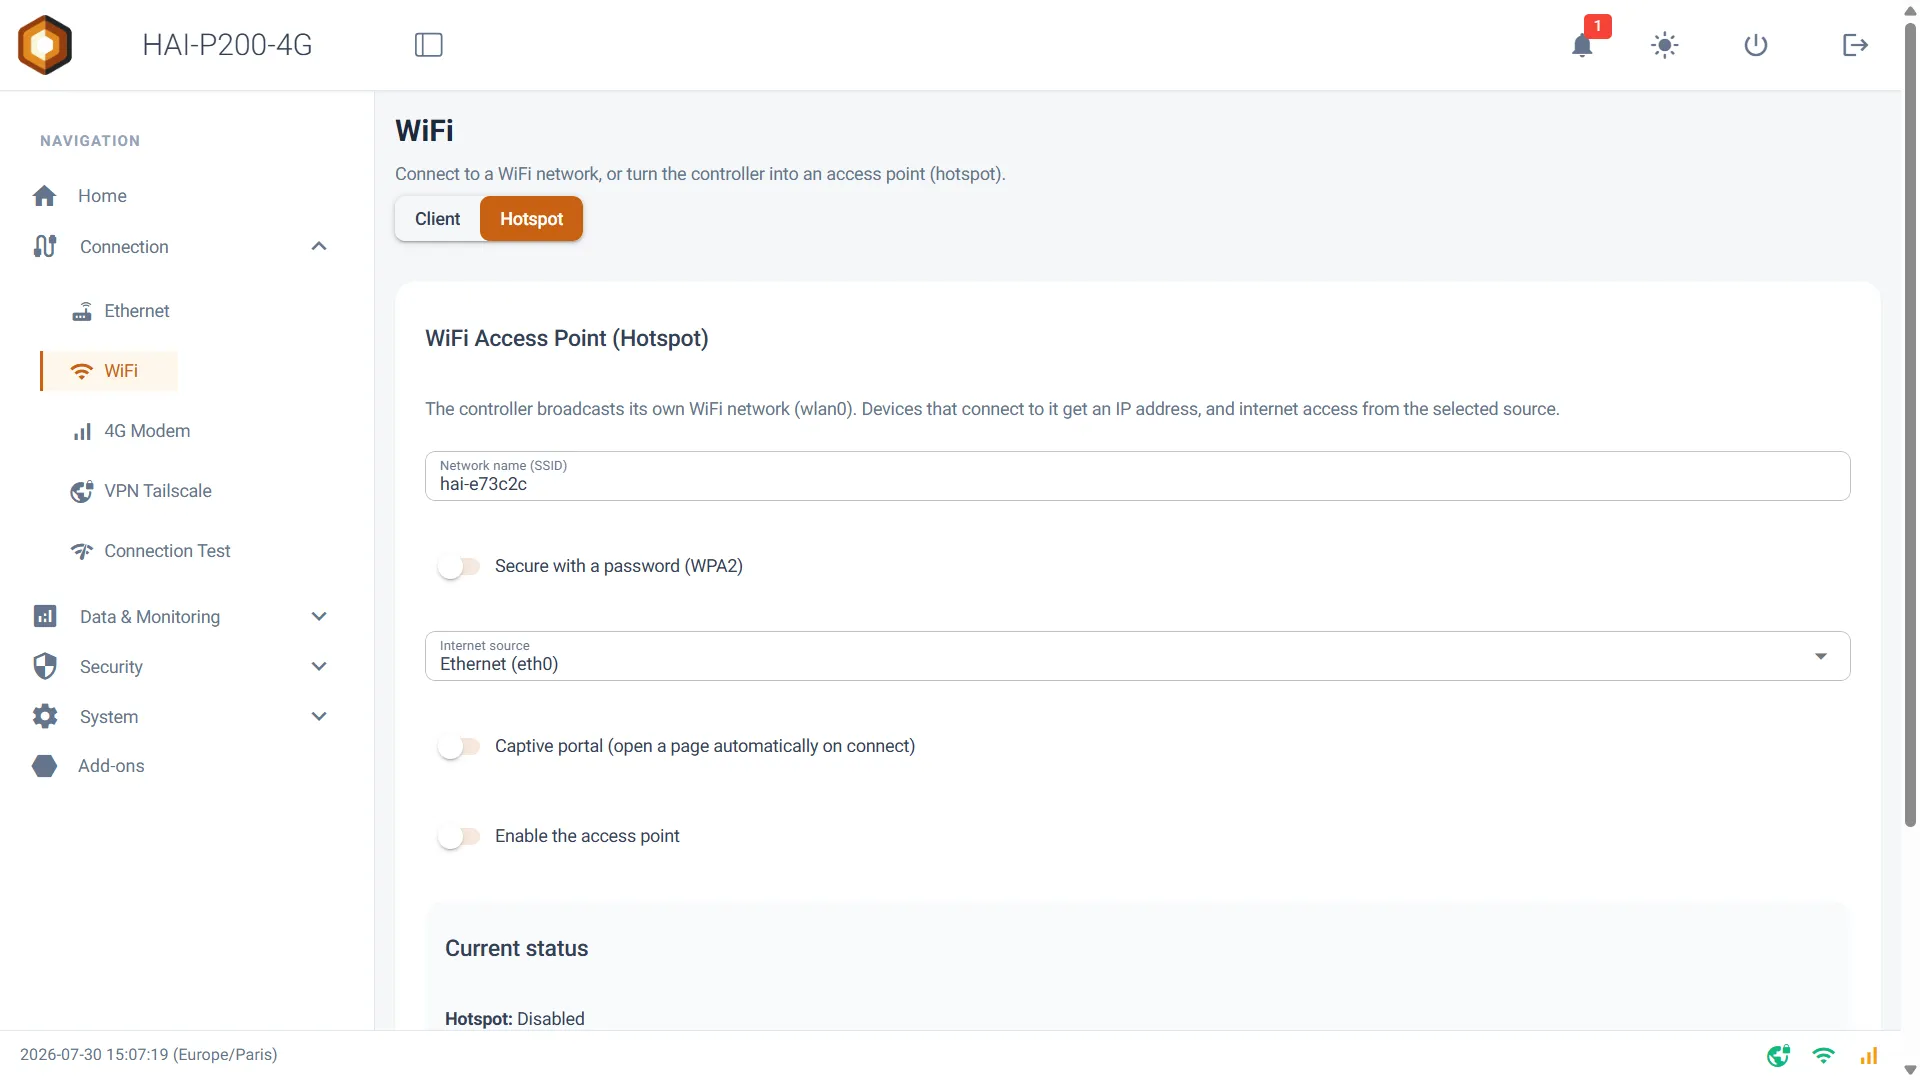
Fill in the fields in order:
1. Network name (SSID) — the name of the WiFi network as it will appear on phones. It defaults to the controller’s name. This field is required.
2. Secure with a password (WPA2) — leave this switch on to protect your network. Turning it off creates an open network, reachable by anyone in range.
3. Password — the WiFi password, 8 to 63 characters.
4. Internet source — determines whether connected devices reach the Internet, and through which path:
- Ethernet (eth0): shares the controller’s wired connection.
- 4G (wwan0): shares the mobile connection.
- None (no internet): no sharing. Devices reach the controller only.
5. Captive portal — see the dedicated section below. Leave it off if you are not sure yet.
6. Enable the access point — turn this switch on.
7. Click APPLY.
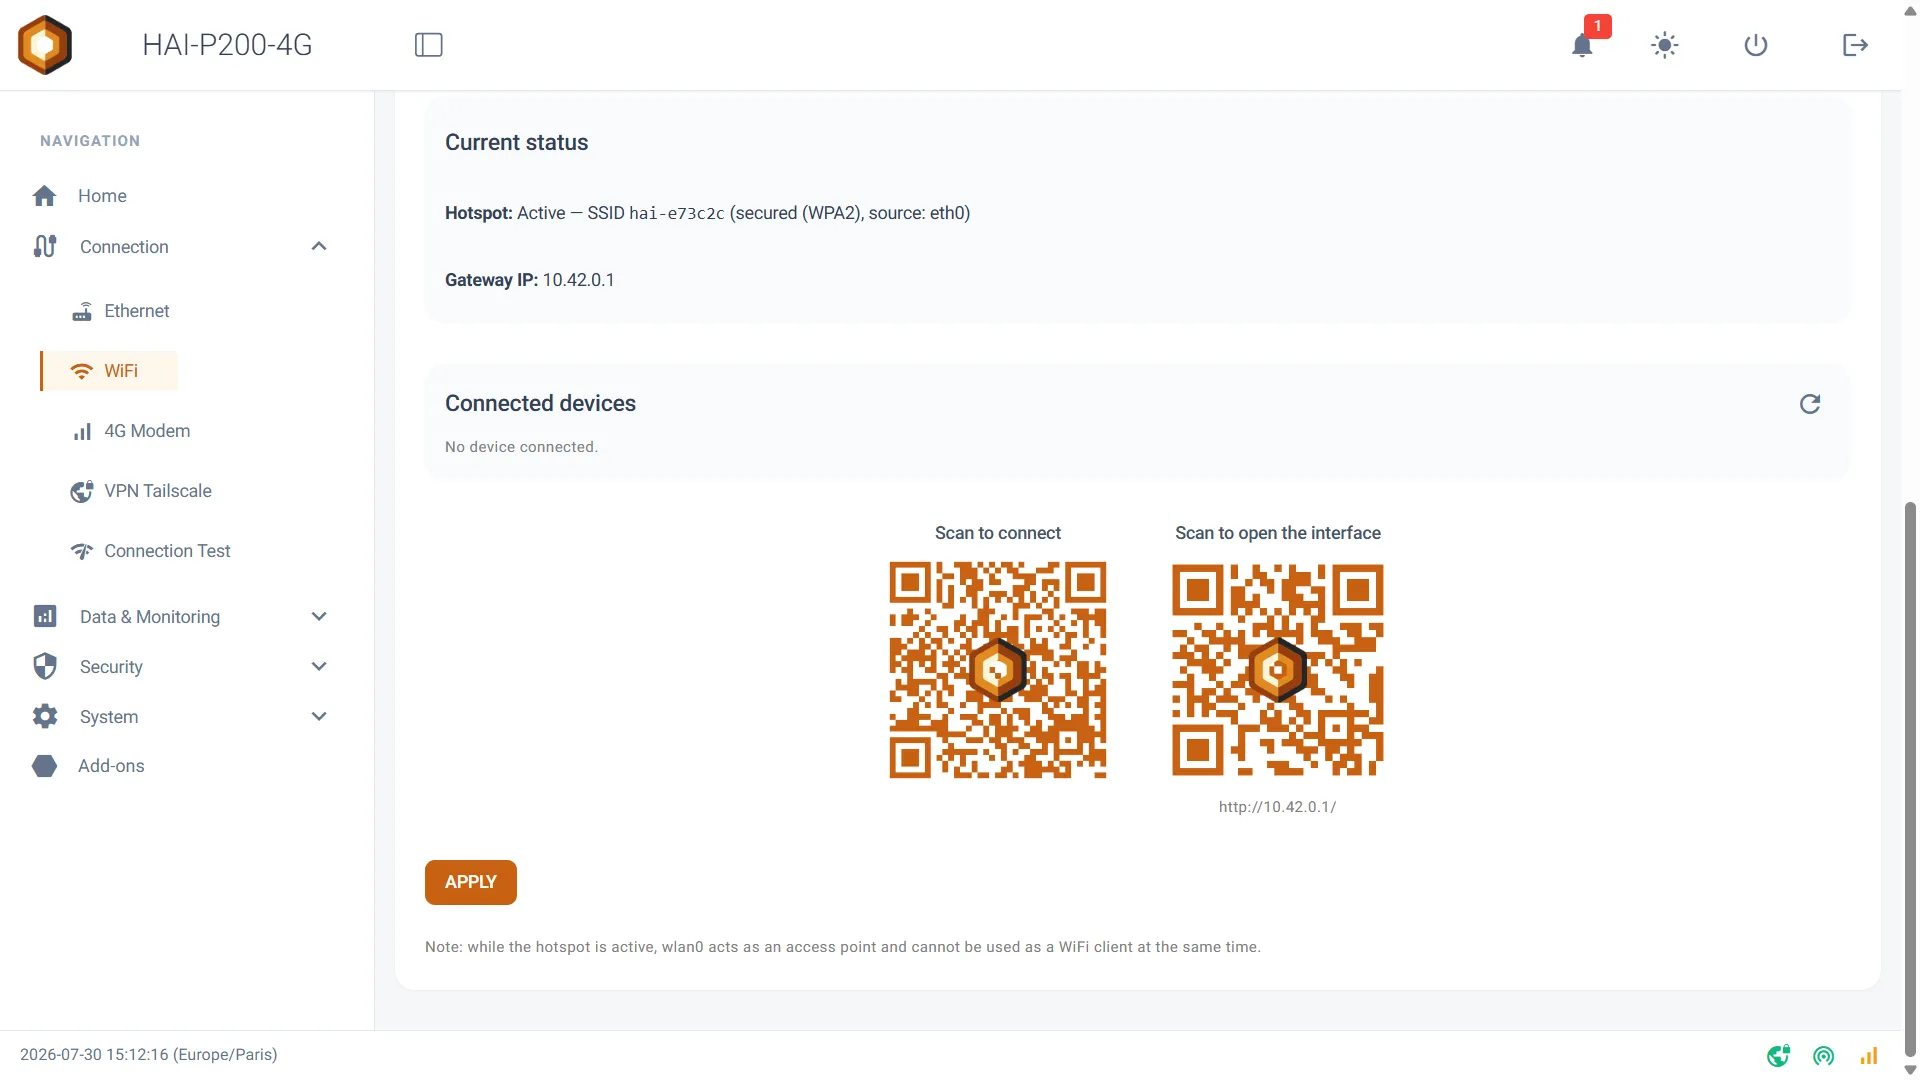
The Current status block then confirms activation: the broadcast network name, the security mode and the Internet source in use. The WiFi icon at the bottom of the interface turns green when the access point is running.
Connecting to the access point
Section titled “Connecting to the access point”Once the access point is running, two QR codes appear on the page:
- Scan to connect: scan it with a phone’s camera to join the network without typing the password.
- Scan to open the interface: opens the controller’s interface directly in the browser.
Click a QR code to enlarge it — handy for having a colleague scan it, or for showing it from a remote workstation.
Manually, join the WiFi network then open http://10.42.0.1 in a browser. That is the controller’s address on its own network, and it never changes.
The captive portal
Section titled “The captive portal”Turn on Captive portal (open a page automatically on connect) so that a page opens automatically on connecting devices, as in a hotel or an airport. The Portal page field sets the destination: a path within the interface (/apps, for example) or a full URL starting with http:// or https://. It defaults to the controller’s home page.
The behaviour depends on the Internet source you chose:
- With an Internet source (Ethernet or 4G): the user sees a landing page telling them they are connected, with the controller’s address, a button to open the interface in their real browser, and a Continue to the internet button that unlocks their Internet access. This is the classic “click to accept” flow.
- With no Internet source (None): the portal becomes a permanently closed network. Any browsing brings the user back to the controller’s page, with no way out. Ideal for a consultation kiosk.
If you do not enable the captive portal, nothing opens automatically: users type http://10.42.0.1 or scan the QR code.
Tracking and managing connected devices
Section titled “Tracking and managing connected devices”The Connected devices block lists the devices present on your access point. For each one:
- its hostname, as announced (unknown if it does not provide one)
- its IP address, its MAC address and its connection time
- the volume of data exchanged (↓ received, ↑ sent), if there has been any traffic
- an internet badge if it has been allowed out through the captive portal, or blocked if it is blocked
Signal strength is not shown: the hardware does not report it while running as an access point.
Blocking a device
Section titled “Blocking a device”The Block button stops a device from using the network: it is disconnected immediately, no longer receives an IP address and its traffic is rejected. The block survives a controller restart, and blocked devices stay listed even when absent, so you can unblock them later with Unblock.
Worth knowing: a blocked device can technically still associate with the WiFi network, but it will get no address and will be able to do nothing. The block is effective, but it is not invisible to the blocked user.
Sharing the Internet connection
Section titled “Sharing the Internet connection”When you choose an Internet source, the controller routes the WiFi devices’ traffic to that interface and handles address translation. Three behaviours to know about:
If the Internet source becomes unavailable (cable unplugged, modem down), the access point keeps running: the WiFi is still broadcast, devices still get an IP address and still reach the controller. Only the Internet is cut. When the connection comes back, however, re-apply the hotspot configuration (the APPLY button) to restore sharing.
With the 4G source, all your visitors’ Internet traffic — phone updates, videos, cloud backups — goes through your mobile plan. On a capped subscription, prefer None (no internet) or the Ethernet source.
Some configurations are incompatible. If the controller already shares its connection to a wired device, the interface warns you: either Hotspot mode is unavailable and you have to turn that sharing off, or the Internet source is locked on None (no internet). The message shown says precisely which sharing blocks what.
Limits and good practice
Section titled “Limits and good practice”- A single radio: Client mode and Hotspot mode are mutually exclusive. Always keep a second way into the controller before switching.
- Around 245 devices can be given an address, but in practice a 2.4 GHz hotspot stays comfortable up to about ten simultaneous clients.
- Automatic restart at boot: if the access point was running, it comes back on its own after boot, with a start-up delay of a few tens of seconds. Do not conclude too quickly that something has failed.
- Remote access through Tailscale keeps working while the access point is running: it is preserved by the network configuration. That is your safety net if you cut the WiFi client by mistake.
- Password: do not leave an open access point on a production installation. A network with no password gives anyone in range direct access to the controller’s interface — and to the Internet if you share it.
Troubleshooting
Section titled “Troubleshooting”| Message | Meaning and action |
|---|---|
| Network name (SSID) is required. | The network name is empty. |
| WPA2 password must be 8 to 63 characters. | Password too short or too long. |
| Portal page must be a path (/apps) or a full http(s):// URL. | The portal page must start with /, http:// or https://. |
| Failed to start the WiFi access point (wlan0). | The radio could not switch to access point mode. Check that no WiFi client connection is being established, then try again. |
| Hotspot unavailable: wlan0 is used as a WiFi client sharing its connection… | A connection sharing already uses the WiFi. Turn it off to free the radio. |
| Connection sharing to eth1 … was turned off… | The wired sharing was turned off automatically, being incompatible with the access point. |
| Access point stopped: wlan0 is back on its WiFi network. | You switched back to Client mode: the access point has been stopped, which is normal. |
| Access point still running on wlan0: stop it to scan for networks. | To scan for WiFi networks, stop the access point first. |
Devices are not getting an IP address? Re-apply the configuration with APPLY. That is the action that puts the whole service back in place (address distribution, routing, portal).