
Tailscale VPN
What is Tailscale?
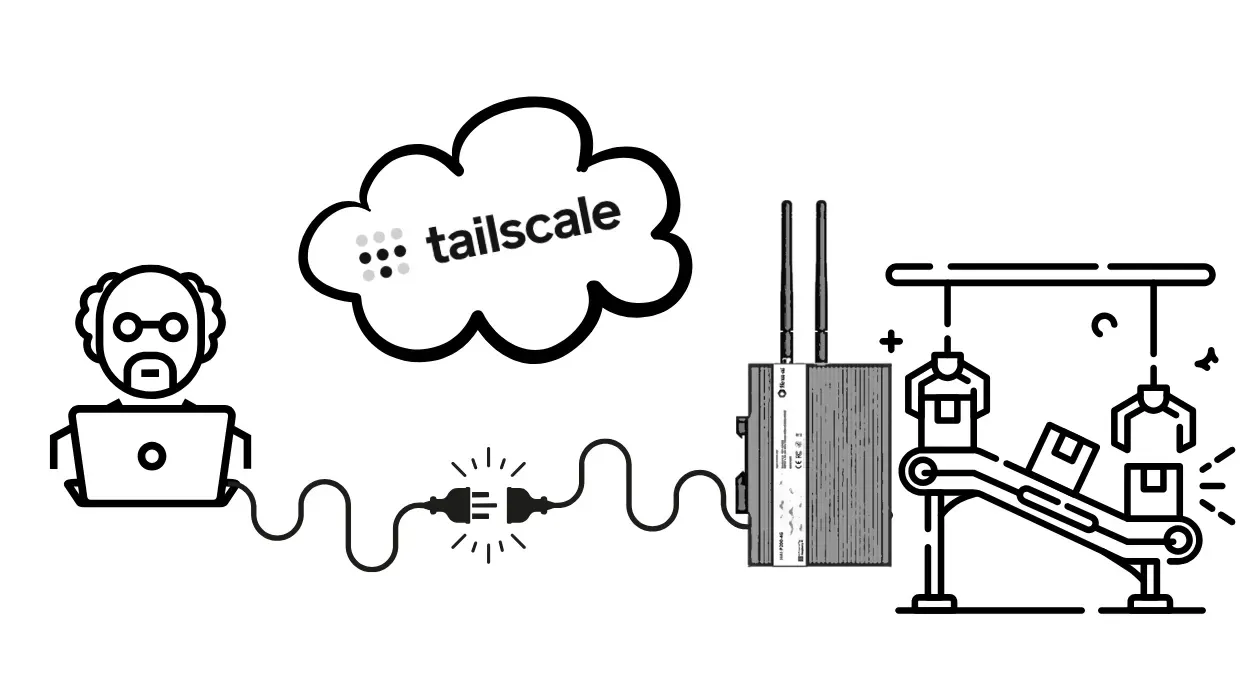
Section titled “What is Tailscale?”Tailscale is a modern, secure virtual private network (VPN) that makes it easy to connect devices to each other, wherever they are in the world. Unlike traditional VPNs, Tailscale uses the WireGuard protocol and a “zero-config” approach that considerably simplifies setting up and managing the network.
Main benefits
Section titled “Main benefits”- Simple, quick configuration: no complex VPN servers to manage
- High-grade security thanks to the WireGuard protocol
- Works through firewalls and NAT with no particular configuration
- Ideal for remote teams and distributed infrastructures
How does it work?
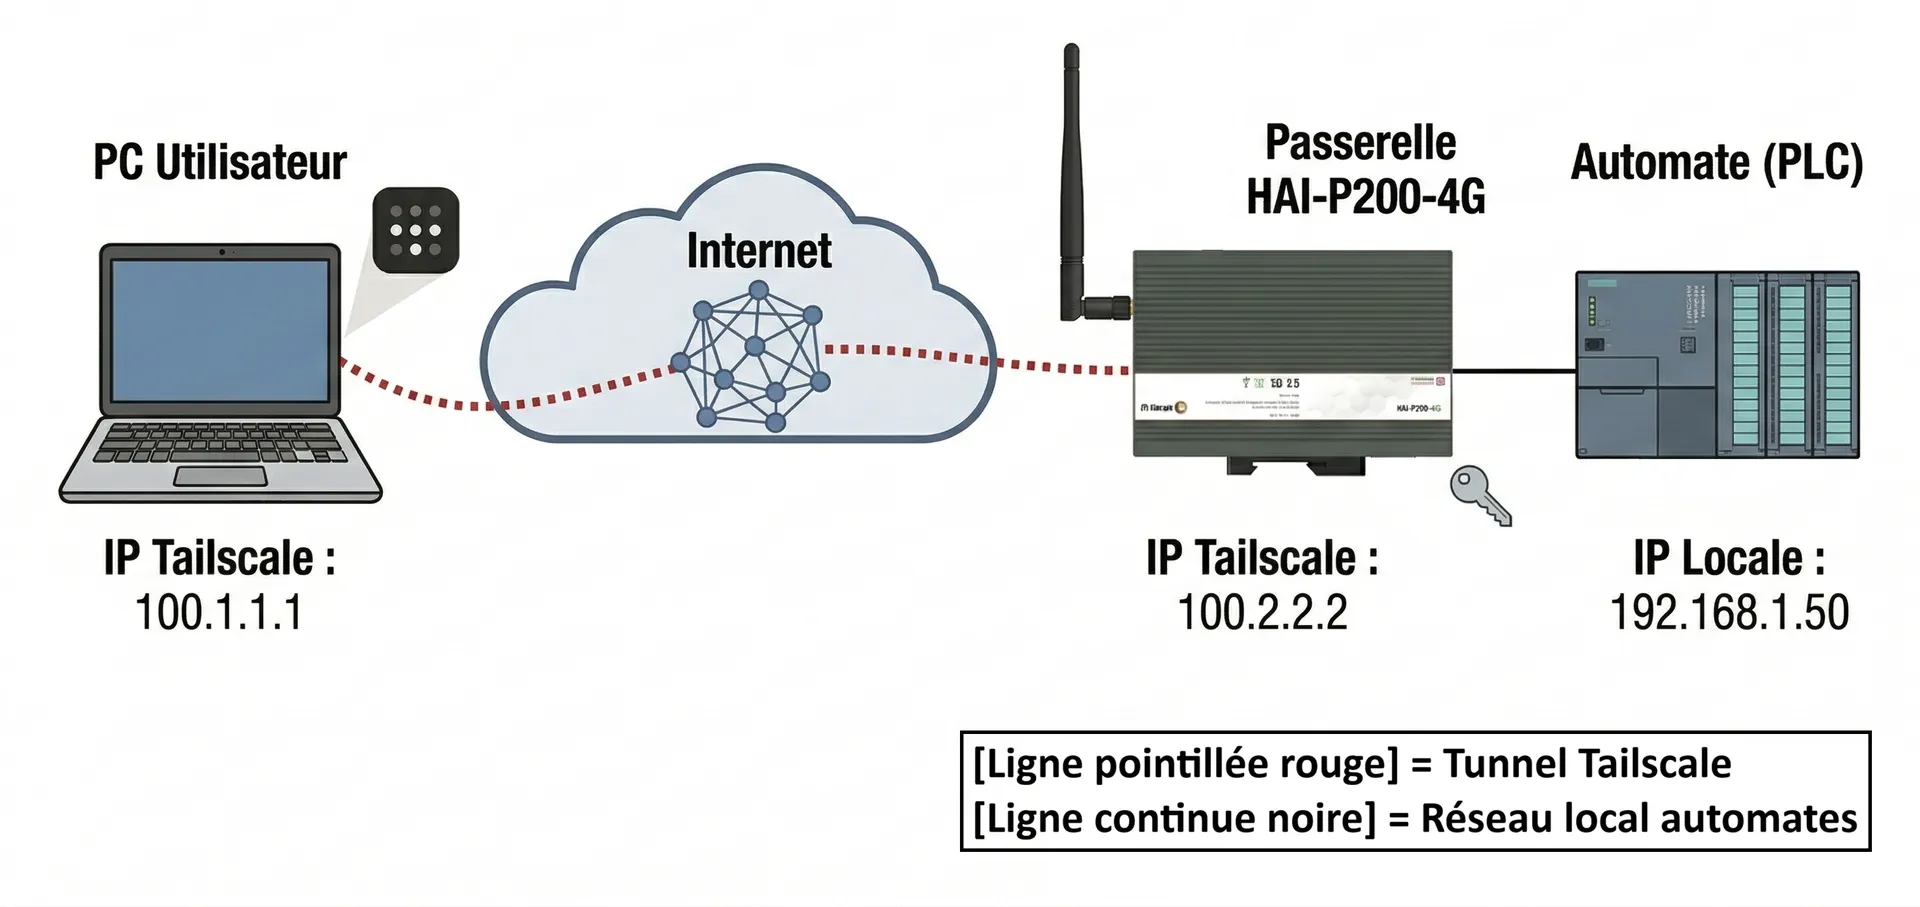
Section titled “How does it work?”Tailscale creates a mesh network between your devices. Each device connects directly to the others, without going through a central server, which optimises both performance and security. Authentication is handled through existing identity providers (Google, Microsoft or GitHub, for example), which simplifies access management.
What you need
Section titled “What you need”- The HAI-P200-4G controller, connected to the Internet
- A computer connected to the Internet
Installing Tailscale on your computer
Section titled “Installing Tailscale on your computer”- Go to https://tailscale.com/ and create your account.
- Choose the version matching your operating system and download it.
- Open the installer, accept the licence and click Install.
- Once the installation is finished, sign in to your Tailscale account. This usually opens a page in your web browser for authentication.
Configuring your devices
Section titled “Configuring your devices”Once installed, connect your computer by clicking the arrow on the right of your Windows taskbar. Click the Tailscale icon (a square filled with dots).


This opens a tab in your web browser. Click the Connect button.
Going back to your sign-up tab, you will see that the device has been added.
Do not add a second device straight away.
Click Skip this introduction at the bottom of the screen.
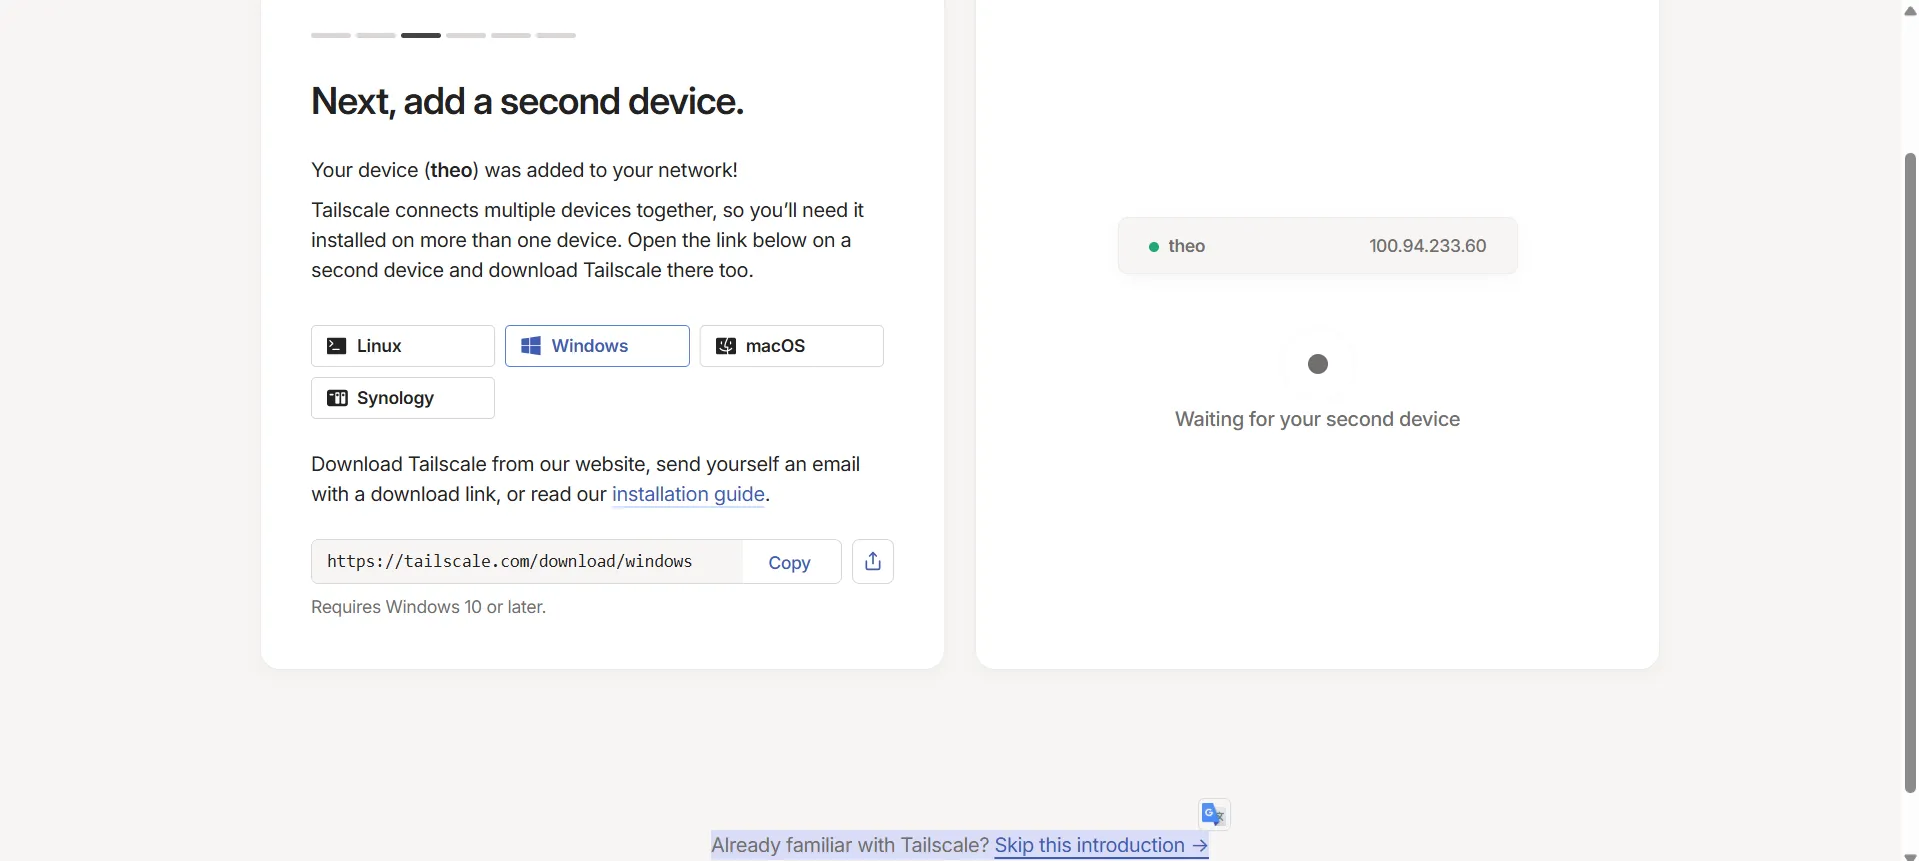
You then reach an admin interface listing the connected devices (including your computer).
In the tabs, open Settings and click Keys in the vertical menu on the left of your screen.
Create a key with the settings you want to apply to it (validity period and so on).
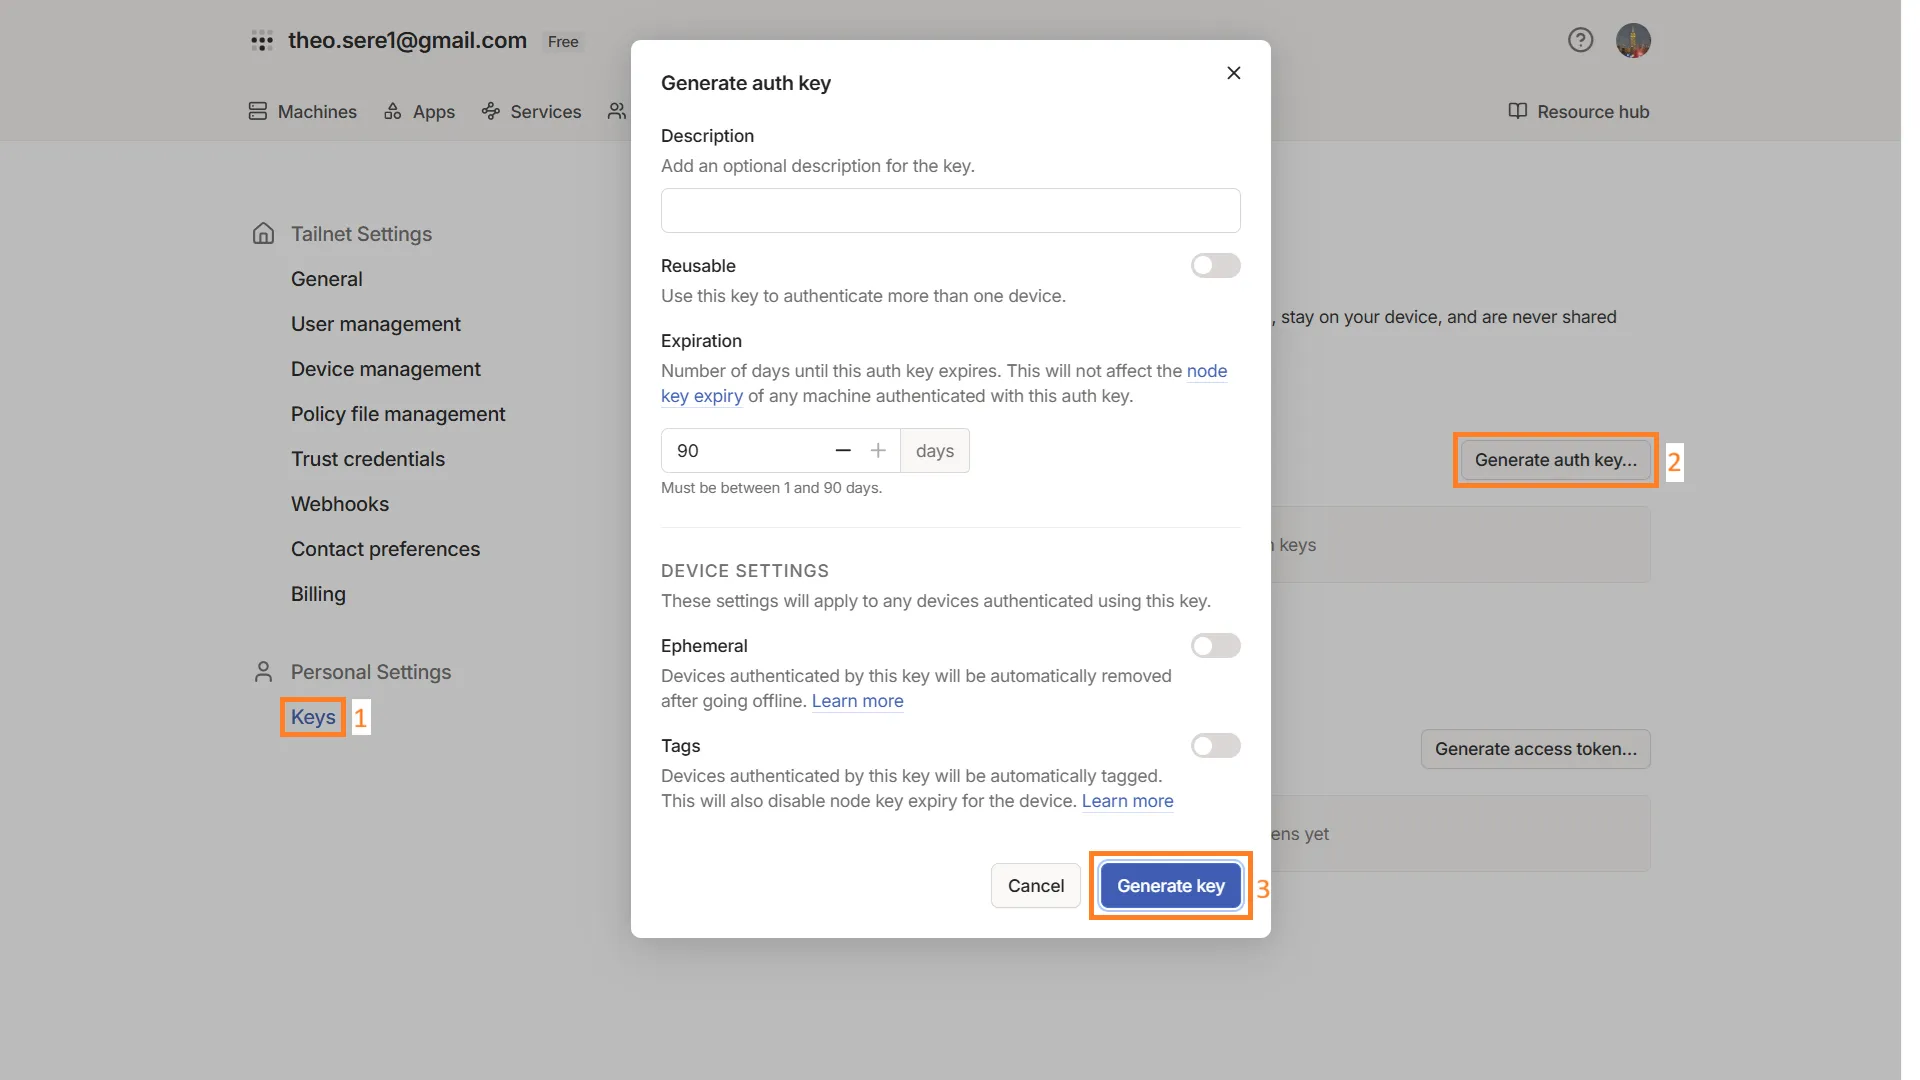
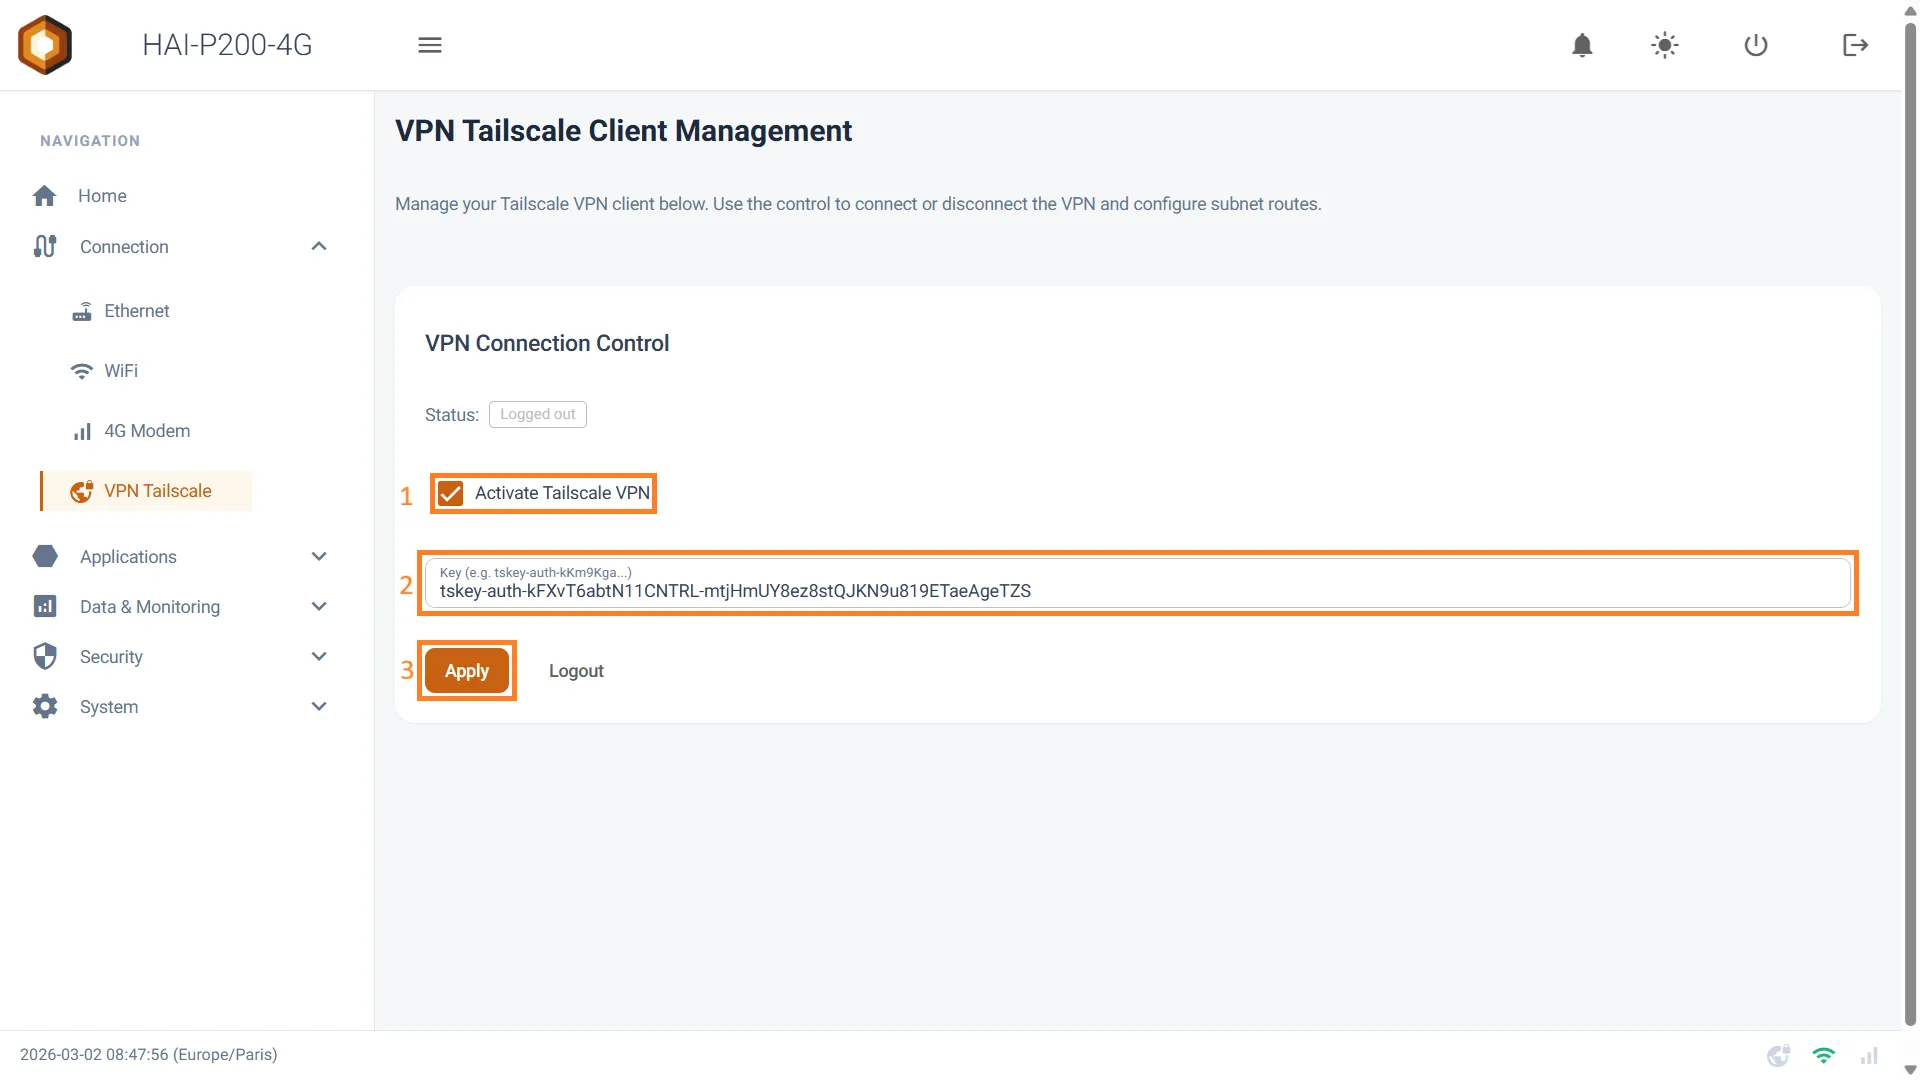
That key can be copied. You can then go to your HAI-P200-4G gateway’s web interface. Click VPN Tailscale and paste your key into the text field. Tick Activate Tailscale VPN and click Apply.
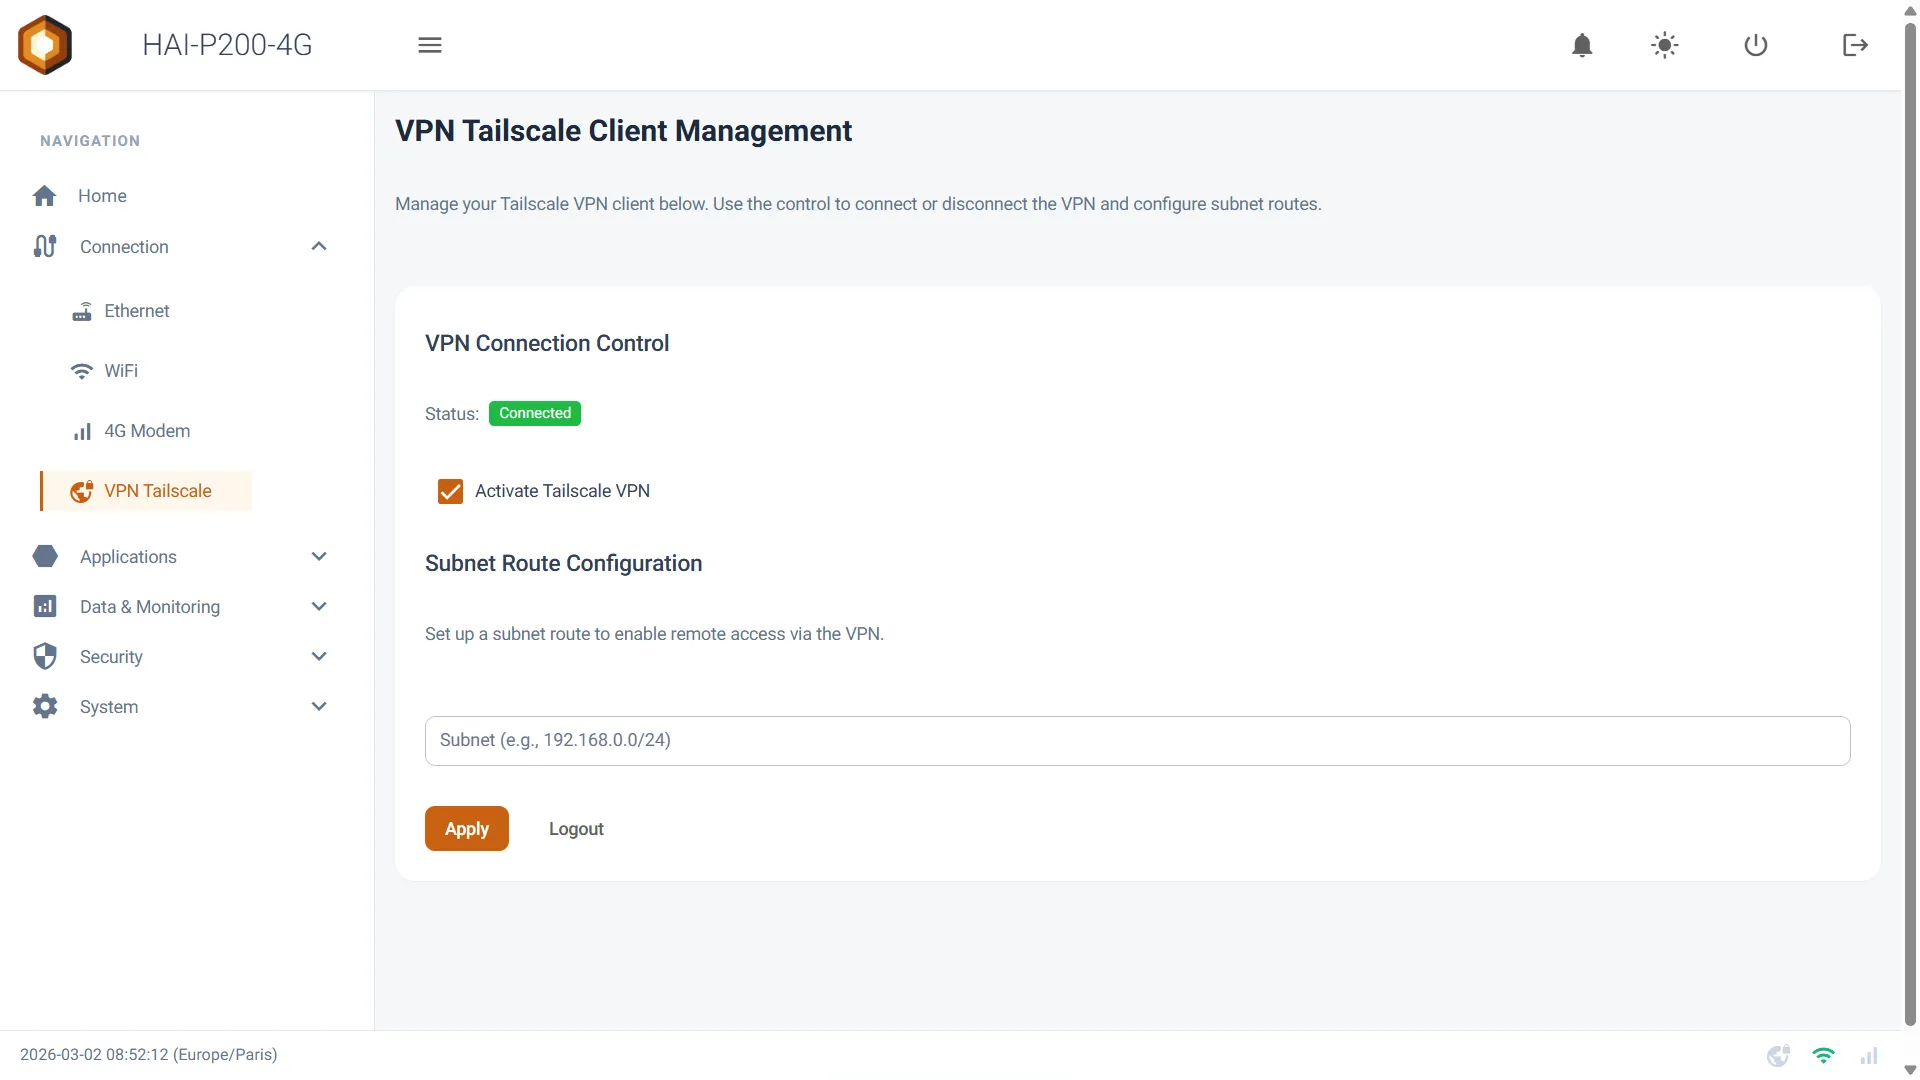
Back on your Tailscale admin interface, you can see your device connected.
Connecting to the gateway
Section titled “Connecting to the gateway”Once both devices are paired, you can reconnect to the gateway by clicking the arrow on the right of the Windows taskbar, then the Tailscale logo.
Click Network devices, then My devices, and select your HAI-P200-4G gateway.
Your computer is connected to your gateway!
Its IP address has been copied, and you can paste it to connect through your browser, in CODESYS…
Exposing subnets
Section titled “Exposing subnets”You can expose a subnet, so as to use the devices connected to it — PLCs, for instance — that are not necessarily Tailscale-compatible.
To do so, connect to your gateway and go to VPN Tailscale.
Enter the subnet address in the Subnet field, in the 192.168.1.0/24 format (CIDR notation), and click Apply.
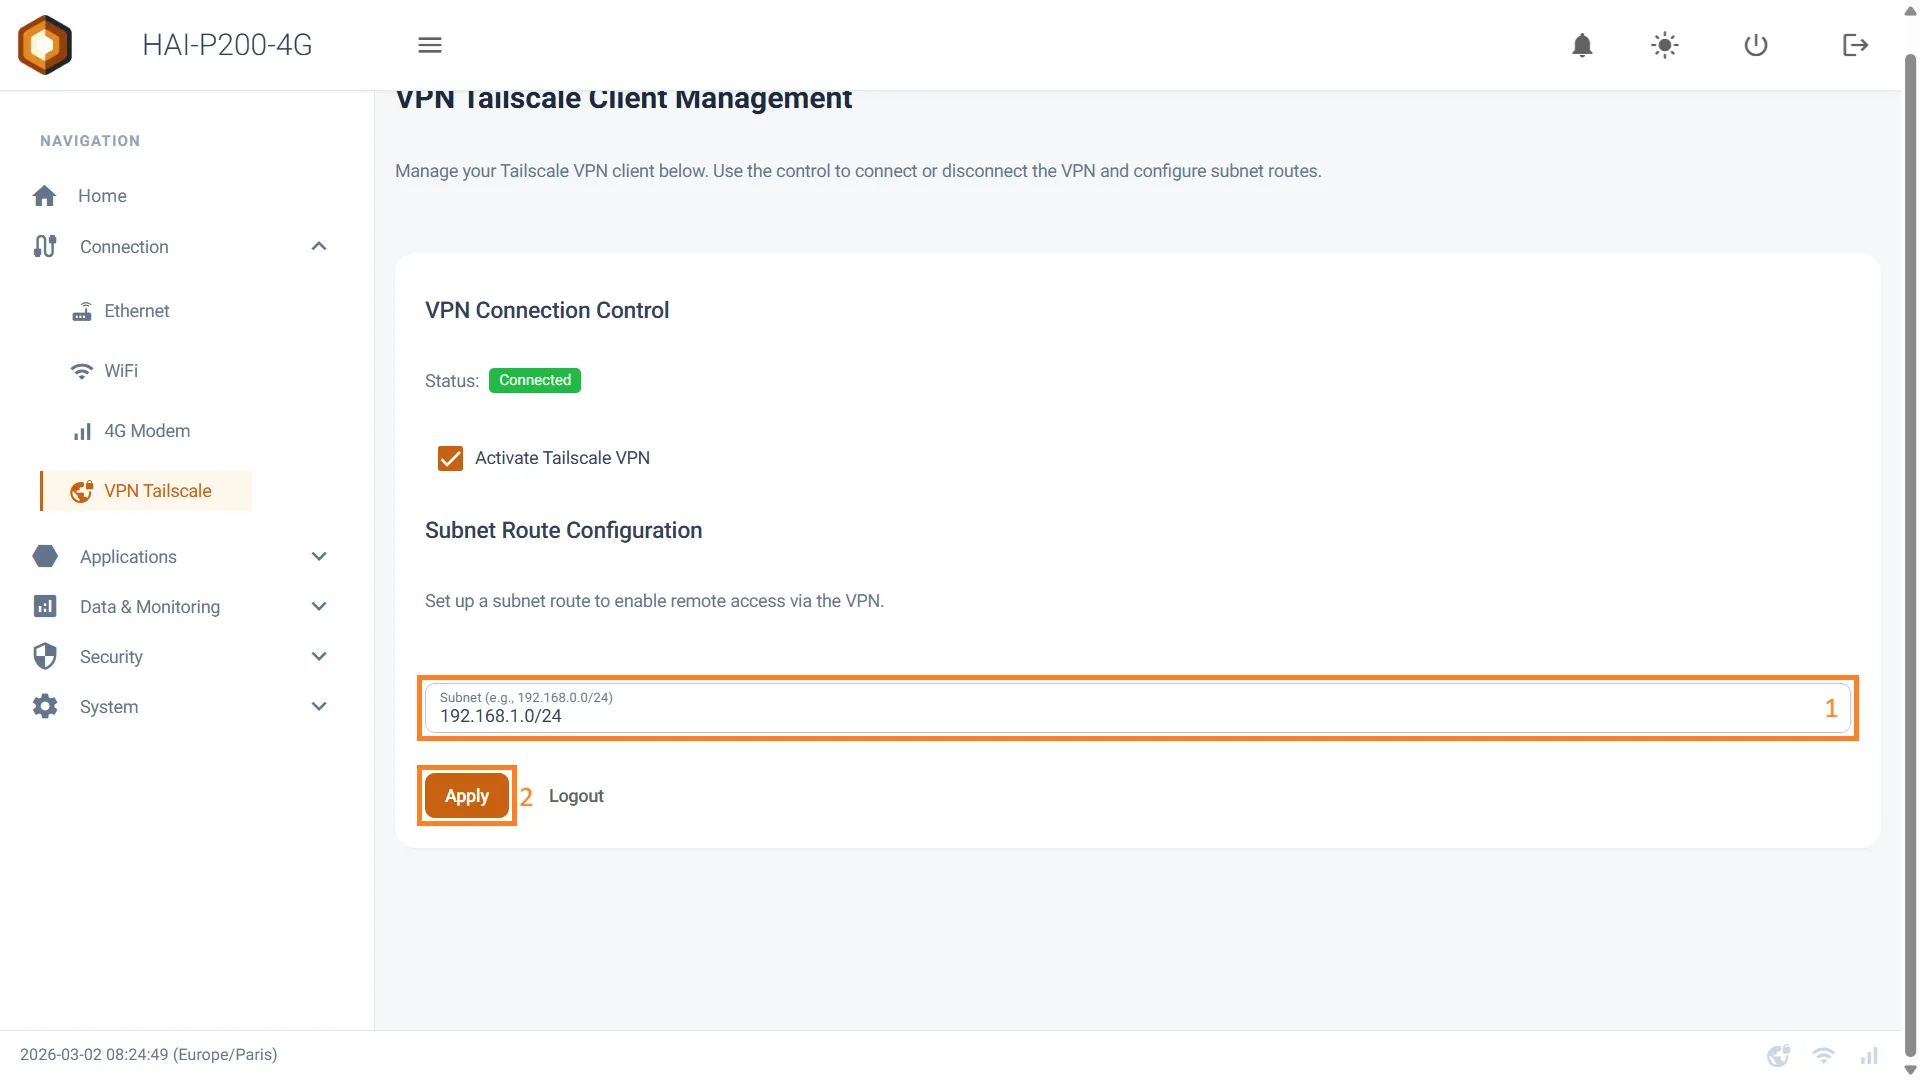
Once confirmed, go to the Tailscale admin interface on their website and click your gateway’s name.
Under Subnets, you should see the list of approved subnets and those awaiting approval.
Find the network address you typed and click Edit.
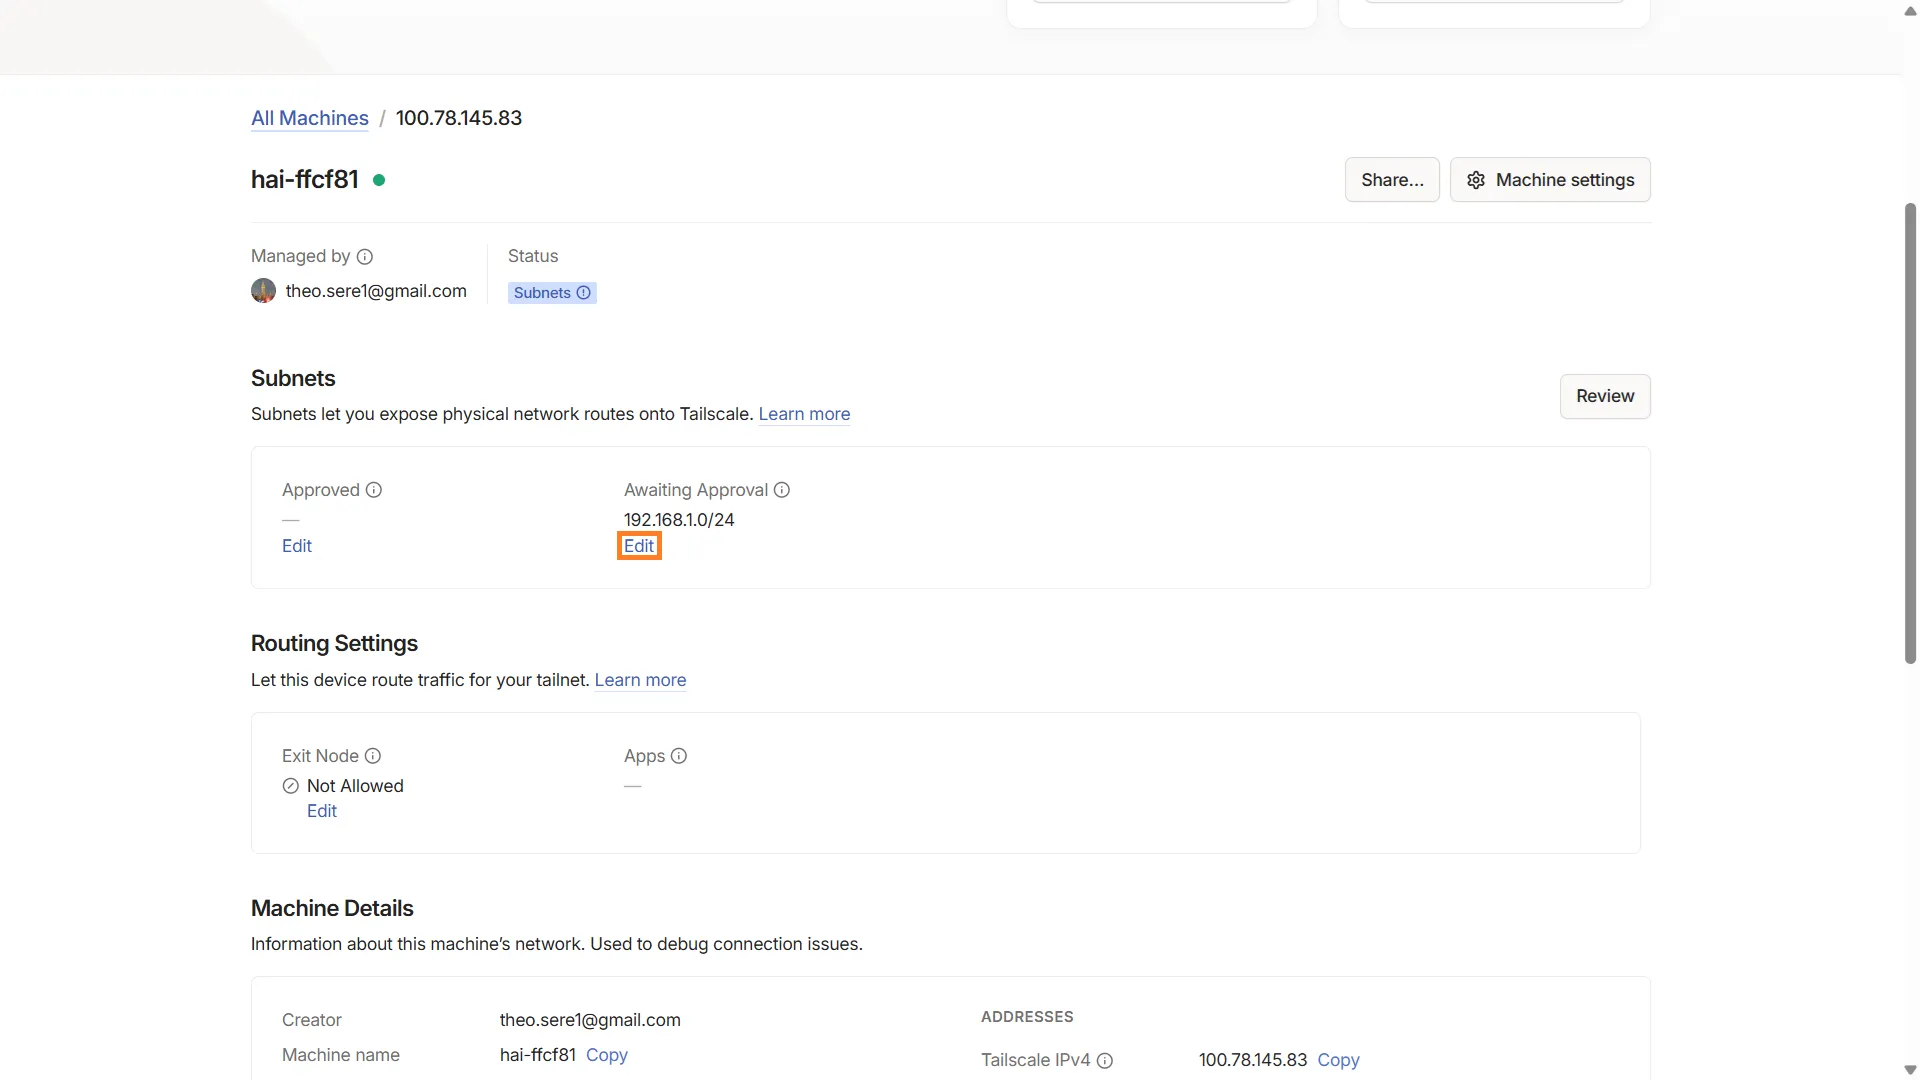
In the pop-up that opens, tick the subnet address and save.
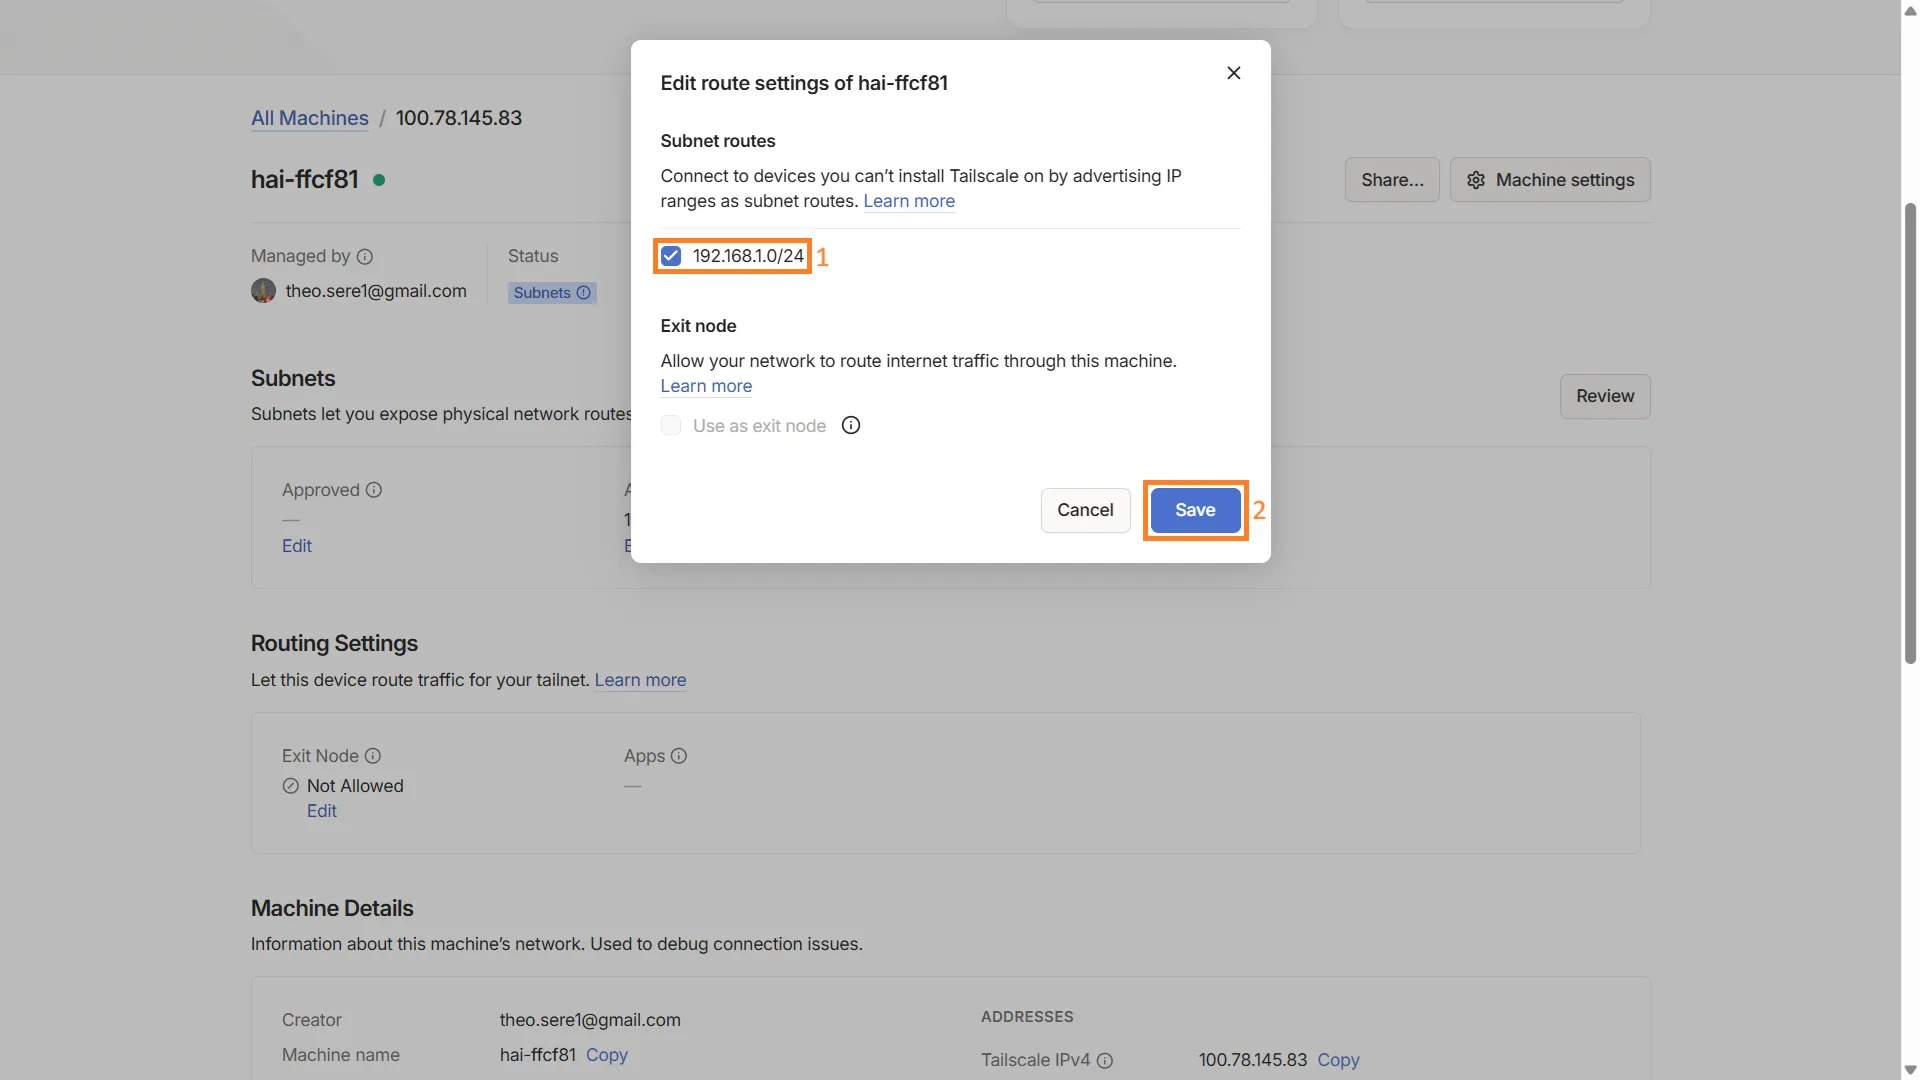
You can now use the devices connected to the subnet!
Port forwarding
Section titled “Port forwarding”The subnet exposure described above makes the machine’s whole network reachable. When that is not desirable — a customer who refuses to open a whole segment, or two sites using the same addressing plan — the gateway can expose a single device, on a single port.
On the VPN Tailscale page, the Mode row offers Subnet Route (the default behaviour) and Port Forwarding. The two are mutually exclusive: choosing Port Forwarding withdraws the advertised subnet route, and vice versa. Both configurations are kept, so switching back to the other mode requires no re-entry. The selector only appears once the key has been entered and the gateway enrolled.
In Port Forwarding mode, the Add a forwarding rule card asks for three values:
- Tailscale port: the port used to come in, on the gateway’s Tailscale address;
- Target IP: the address of the device to reach (a private IPv4, on a network directly connected to the gateway);
- Target port: the TCP port of the service you are after — 80 for a web HMI, 22 for SSH, 502 for Modbus/TCP.
The Test button checks, without saving anything, that the service answers and that the chosen port is free. Add saves the rule and activates it immediately: the Apply button at the bottom of the page only concerns the VPN connection. Test all re-probes every rule in the table, and the bin icon deletes one (any connections in progress are then cut).
The address to hand out is the gateway’s address on the tailnet, followed by the chosen port: with a rule 8080 → 192.168.1.50:80, you open http://100.84.12.7:8080. The target device needs no configuration at all — no gateway and no return route to declare, since it sees a connection coming from the gateway.
Note: the forwarding only works over TCP (no UDP, no ping), and is reachable from the VPN only — never from the local network, the 4G link or the plant Ethernet. Every addition and every deletion is logged in Security > Audit & Logs.