
Remote access quick start
Welcome to your HAI-P200-4G controller, powered by HAI-OS. This guide walks you through turning the gateway into a secure remote-access bridge (VPN). Within minutes you will be able to reach your industrial equipment — PLCs, HMIs — from anywhere, as if you were on site with a cable.
Step 1: First connection
Section titled “Step 1: First connection”Once your HAI-P200-4G controller is connected to power, you need to reach it.
By default, the controller’s Ethernet 1 (eth1) port — the machine-network side — is preconfigured with the static IP address 192.168.1.16 and the subnet mask 255.255.255.0.
-
Connect your configuration PC directly to the controller’s Ethernet 1 port with a network cable (make sure your PC’s network adapter is set to the same subnet — for example IP 192.168.1.5).
-
Open a web browser and enter the address https://192.168.1.16.
-
On the login page, enter the default credentials:
-
Username: admin
-
Password: hai1@
-
-
The gateway opens a configuration screen and asks you to set your administrator password.

Step 2: Giving the gateway Internet access
Section titled “Step 2: Giving the gateway Internet access”To establish the outbound VPN tunnel, the controller needs an Internet connection.
Expand the Connection menu in the left sidebar and pick how it reaches the outside world:
-
Ethernet (eth0): configure this port — the plant or corporate side — in DHCP mode, or with a static IP provided by the IT department.
-
WiFi: turn on the WiFi radio, scan for nearby networks and connect to the plant access point.
-
4G Modem: if you have a SIM card, enter the APN and PIN code to bring up an independent cellular link.
Step 3: Setting up the VPN tunnel (Tailscale)
Section titled “Step 3: Setting up the VPN tunnel (Tailscale)”Now that the gateway has Internet access, let’s attach it to your private network so you can reach it remotely.
-
Go to Connection > VPN Tailscale.
-
Tick the Activate Tailscale VPN checkbox.
-
Key: enter the authentication key generated from your Tailscale admin console — it usually starts with
tskey-auth-— then click Apply. The status turns to Connected and the Key field disappears: the gateway is enrolled. -
The Mode selector then appears, set to Subnet Route. Keep that mode for remote maintenance. (The other mode, Port Forwarding, exposes a single device on a specific port; see the Tailscale VPN article.)
-
Subnet Route Configuration: enter the machine network — the one on the eth1 port — that you want to make reachable remotely. Give the network address, not a device address: if your PLC is at 192.168.1.50, enter
192.168.1.0/24. -
Click Apply again. It is this second click that advertises the route.
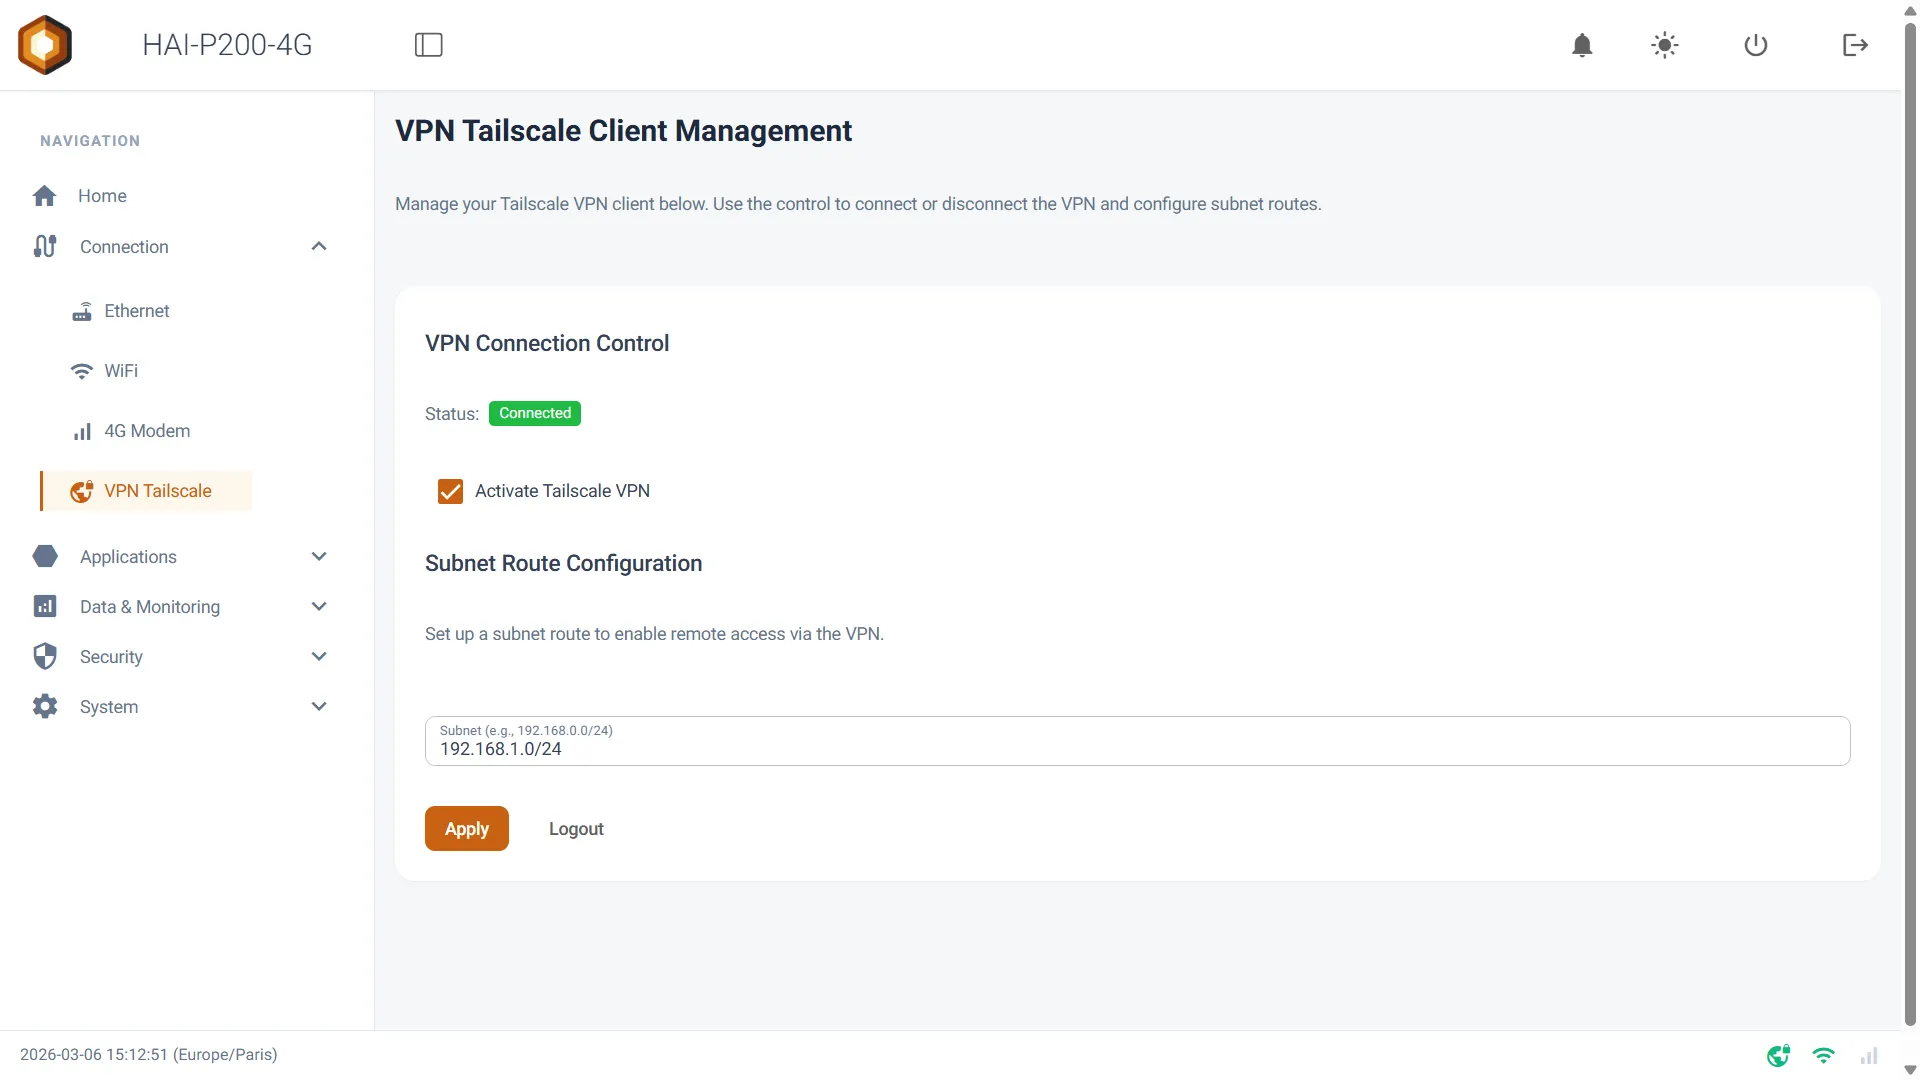
The status turns to Connected, in green. The gateway’s router now forwards traffic from your remote network straight through to your machine network.
Step 4: Reaching your equipment
Section titled “Step 4: Reaching your equipment”The machine-side setup is done. From now on, from your desk or on the road:
-
Make sure the Tailscale client application is running on your work PC and signed in to the same account.
-
Open your usual programming software (TIA Portal, CODESYS, SoMachine…) or a web browser.
-
Enter your PLC or HMI’s local IP address directly (e.g. 192.168.1.50).
The connection is established transparently, and encrypted end to end.
Congratulations
Section titled “Congratulations”Your HAI-P200-4G controller is up and secured. To go further, see the dedicated documentation on how to:
-
declare firewall rules to strictly limit who may talk to the machine;
-
enable connection sharing if your PLC itself needs Internet access, to synchronise its clock or reach a cloud service.